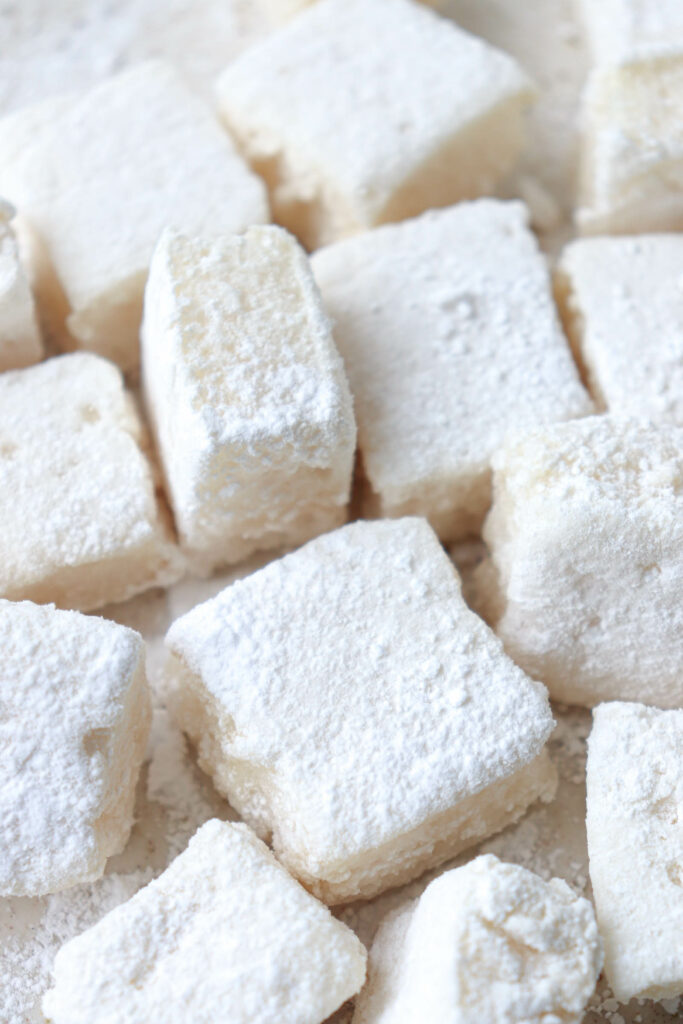
These Gluten Free Marshmallows are light, fluffy, and really easy to make with only 5 ingredients! These homemade vanilla marshmallows are AIP/paleo, refined sugar-free, and delicious.

These Gluten Free Marshmallows are sweet, puffy, pillowy soft, and melt-in-your-mouth type yummy! With their classic light vanilla flavor and squishy texture, I think they taste even better than the store brands!
If you have celiac disease or a gluten sensitivity, this gluten-free marshmallows recipe is for you! No need to scour ingredient lists for sneaky gluten or worry about cross-contamination in the manufacturing process with these homemade marshmallows. They are so easy to make you’ll wonder why you never tried to before!
Plus, you only need a few ingredients to make them! Bloomed gelatin whisked with an unrefined sugar mixture sweetened naturally with maple syrup, a touch of salt, and some vanilla is all you need to make the marshmallow mixture. Arrowroot starch is used instead of confectioners sugar to prevent the marshmallows from sticking and to keep them refined sugar-free as well as grain-free!
The hardest part of making these marshmallows is waiting for them to set! Patience is key, but the result is so worthwhile! Once they’re ready, you can enjoy them as is, toast them, or even roast them on a campfire!
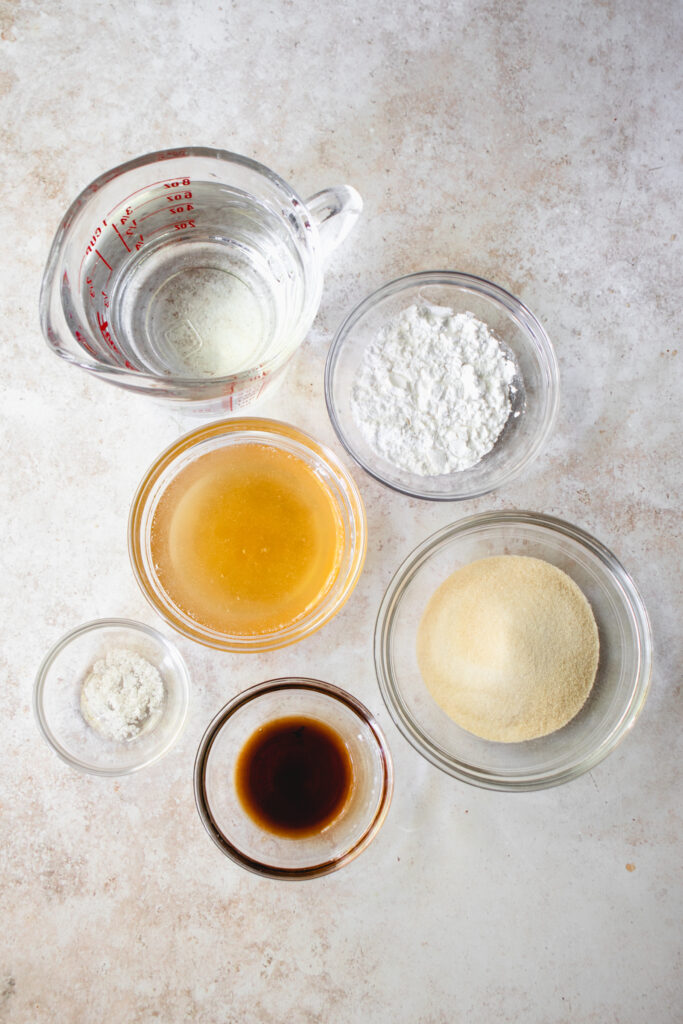
Recipe Ingredients
- gelatin
- maple syrup
- pure vanilla extract
- sea salt
- arrowroot starch
Ingredient Substitutions
- You can replace the maple syrup with honey. I think the maple syrup creates a better texture and more neutral flavor but honey also works.
- You can swap the arrowroot starch with tapioca starch, to coat both the bottom and top of the marshmallows.
How to Make Gluten Free Marshmallows
Step 1: Prepare the baking dish and spatula
Line a 9×13-inch baking dish with parchment paper and sprinkle arrowroot starch generously and evenly onto the paper to prevent the marshmallows from sticking. Alternatively, grease the dish with coconut oil or palm shortening, then with sprinkle arrowroot starch. Also, grease a spatula with coconut oil or palm shortening to help spread the marshmallow mixture.
Step 2: Bloom the gelatin
Measure 1 cup of cold water and pour into a small bowl. Evenly sprinkle gelatin over the water to allow it to bloom evenly. The gelatin blooms when it has absorbed the water and swells, creating a gelatin mixture.

Step 3: Make the maple syrup mixture
While the gelatin blooms, make the maple syrup mixture. Whisk the maple syrup, ¼ cup water, sea salt, and vanilla in a small saucepan over medium heat. You want the mixture to come to a vigorous boil for at least one minute. Remove from heat and immediately proceed to Step 4. If you use a candy thermometer for accuracy, check that the temperature reads 240F, then remove from heat.

Step 4: Make the marshmallow mixture
Add the bloomed gelatin mixture to the bowl of a stand mixer with a whisk attachment. You can also use a large bowl with an electric handheld mixer. Turn the mixer on high speed, then slowly pour the hot maple syrup mixture against the side of the bowl. Whisk the mixture on high speed for 3.5-5 minutes or until soft peaks form. The marshmallow mixture should be light and fluffy and increase to about three times the initial volume. Be careful not to overbeat it as it will begin to set too quickly and will not be easily pourable or spreadable.

Step 5: Let the marshmallows set
Immediately pour the marshmallow mixture into the prepared pan. Use the oiled spatula to help scrape the mixture, spread it evenly, and smooth the top. Use a sieve to dust the top of the marshmallows with additional arrowroot starch. Cover the dish with plastic wrap and set it on the countertop to dry out for at least 6 hours or overnight.

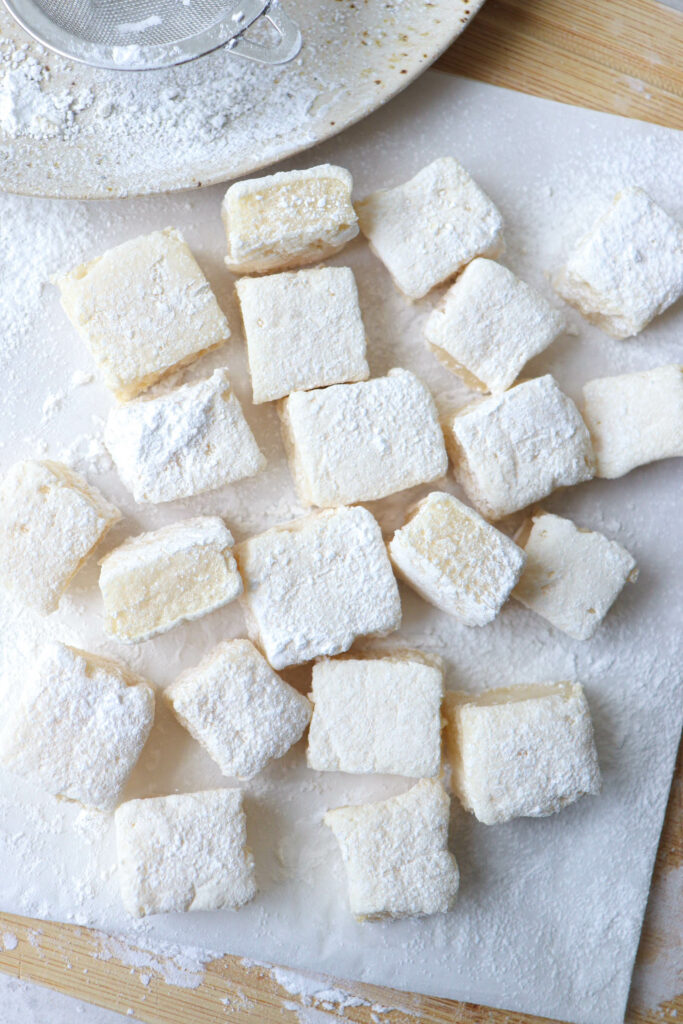
Step 6: Cut the marshmallows
Use a sharp knife greased lightly with coconut oil to cut the gluten-free marshmallows into the desired size squares. If they are still sticky, dust or toss them with additional arrowroot starch.
Expert Tips & Tricks
- Evenly sprinkle the gelatin over the surface of the water. Blooming ensures the gelatin will dissolve easily and evenly without clumps when combined with the hot maple syrup mixture.
- I highly recommend using a stand mixer with a whisk attachment or a large bowl with an electric hand mixer to mix the marshmallow spread. The mixture has to be whipped at a very high speed to achieve the marshmallows’ optimal light and airy texture. You won’t get the same results if you try it manually.
- When pouring and spreading the mixture, you need to work quickly. If not, the marshmallows will cool and begin to set, so they won’t be liquid enough for you to manipulate them and the texture will be off.
Variations
Get creative by adding flavors or colors to these gluten-free vanilla marshmallows!
Some flavor ideas:
- Try adding 1/8 tsp peppermint extract to these for peppermint marshmallows.
- Make these chocolate with the addition of a TBSP of carob powder or cacao powder (AIP-reintro).
Color options:
- Experiment with other natural food dyes like beet powder, carob powder, turmeric or matcha powder.
Halloween Marshamallows
- Use a fun ghost shaped cookie cutter like this one to make homemade Halloween marshmallows. I made the eyes and mouth with some melted dairy-free chocolate chips.

Frequently Asked Questions
I haven’t tried a gelatin substitute in this recipe to make these vegan so can’t recommend one.
When powdered gelatin is sprinkled on top of a cold liquid and left to stand for several minutes, the gelatin granules will swell with the absorbed liquid. This process is known as blooming. When the gelatin mixture is heated (with the hot maple syrup mixture in this instance), it will dissolve evenly without any blobs of gelatin. Blooming gelatin is necessary to achieve the marshmallows’ smooth texture and consistency, and ensures that the gelatin sets properly as the marshmallow mixture dries.
Sort of! They won’t roast over an open flame like store bought marshmallows made with corn syrup and additives but they do broil in the oven. If you want to try to do so, you are going to want to leave them to dry out at for a significantly longer period of time. Cut them into squares after the minimum 6 hours and then leave them out on a piece of parchment paper in a dry area at room temperature, for a full day. This allows them to firm up some more as the gelatin sets more, to withstand the heat. I have successfully broiled them after drying out for 24 hours, by using my oven’s broiler function for 30-45 seconds.

How To Use Marshmallows
These gluten-free marshmallows are a great treat to eat just as they are! You can also roast or toast them if you let the cut marshmallows dry out for an additional 24 hours so that the gelatin fully sets.
These marshmallows are divine in a mug of Peppermint Hot Chocolate and are the perfect topping for this Sweet Potato Casserole.
Storage Instructions
Store these gluten-free marshmallows in a sealed container on the countertop in a cool, dry area for up to 4 days or in the refrigerator for about a week.
More Gluten-Free Treats You’ll Love:
- Lemon Custard with Strawberry Compote
- Gingerbread Squares
- Pumpkin Spice Gummies
- Gluten-free Vegan Lemon Bars
- Strawberry Cookies
If you try this Gluten Free Marshmallow recipe I would love if you gave it a star rating and short review. Be sure to snap a picture of the finished product and share it with me on Instagram by tagging @healmedelicious
Print
Gluten Free Marshmallows Recipe (AIP, paleo)
- Total Time: 15 minutes
- Yield: 1 9 x 13 baking dish 1x
- Diet: Gluten Free
Description
These Gluten Free Marshmallows are light, fluffy, and easy to make with only 5 ingredients! These homemade vanilla marshmallows are AIP/paleo, refined sugar-free, and delicious.
Ingredients
- 3 TBSP gelatin
- 1/2 cup maple syrup
- 1 1/4 cup water (divided)
- 1/4 tsp sea salt
- 1 tsp pure vanilla extract
- tapioca or arrowroot starch for dusting marshmallows
Instructions
- Line a 9×13 inch baking dish with parchment paper and evenly and generously sprinkle with arrowroot starch.* Grease a spatula with coconut oil or palm shortening.
- Add 1 cup cold water to a bowl and evenly sprinkle gelatin on top to allow it to bloom (about 5 minutes).
- In a small saucepan over medium heat, whisk together maple syrup, remaining 1/4 cup water, sea salt and vanilla. Bring to a vigorous boil and allow to boil at least 60 seconds so the mixture is very hot.**
- In the bowl of a stand mixer with a whisk attachment or in a large bowl with an electric hand mixer, add the bloomed gelatin mixture and whisk on high speed.
- Slowly pour in the boiling hot maple syrup mixture against the side of the bowl. Beat on high for 3.5-5 minutes, until soft peaks form. The marshmallow mixture should be light and fluffy, and should triple in volume.***
- Quickly pour the mixture into the prepared pan. Use the greased spatula to evenly spread the mixture and smooth the top.
- Use a sifter or fine meshed sieve to dust the top with arrowroot starch.
- Cover the dish with plastic wrap and allow it to set on the countertop for a minimum of 6 hours or overnight.
- Lightly grease a sharp knife with coconut oil or palm shortening and slice the marshmallows into squares. Toss with additional starch if necessary.****
Notes
*Or, grease the baking dish with coconut oil or palm shortening then sprinkle generously and evenly with arrowroot starch.
**If using a candy thermometer, cook the mixture until the temperature reads 240F.
***Be careful not to overbeat the mixture or it will begin to cool and set too quickly and no longer be easy to pour or spread. See desired consistency in photo and in video embedded in blog post.
**** If you want to toast or roast these, you will need to leave the cut marshmallow squares to dry out for at least an additional 24 hours in a cool, non-humid environment.
- Prep Time: 15 minutes
- Rest Time: 6 hours+
- Cook Time: 10
- Category: Dessert
- Method: Stovetop
- Cuisine: American
These look tasty. I have never made homemade marshmallows. I should give it a try.
This did not work for me. I am not sure what I did wrong. I basically just ended up with maple syrup Jell-O. It would not whip.
Hi Alisha, not sure what could have happened. Did you beat on high speed? Was your gelatin “bloomed” before you started beating?
Just made these and they’re amazing!
Can these be used to make other desserts (like rice crispie treats)?
Hi Caitlyn, we haven’t tried making rice krispie treats with these marshmallows, but they should be fine. If you do try, let us know how it turns out!
I need to make these.